

How To Install A New Doorbell Button
How to install a doorbell push
Ring Guests In
Calculation a doorbell to your dwelling house lets friends, delivery services and guests notify you of their presence. While traditional door knockers serve the same purpose and work well for smaller homes, yous may not hear them if you're in a dorsum chamber or out on the deck. Doorbells let you identify the chime virtually the center of the house so you can hear information technology in every room. Yous can also choose a product with a push that matches your abode's outside when you lot learn how to install a doorbell.
Parts and Placement
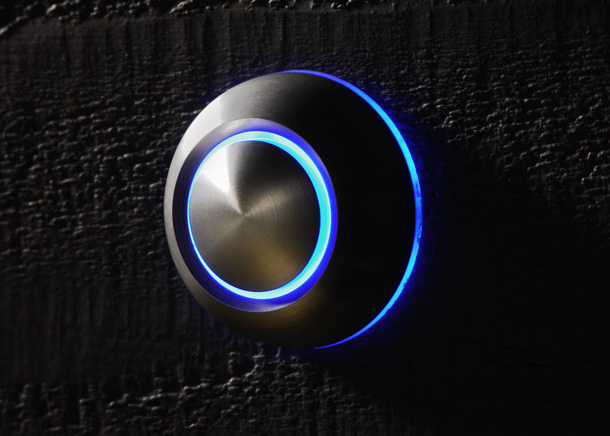
Doorbells are relatively simple devices, just they do take several parts. The well-nigh visible component is the push mounted next to your front door. They come in many finishes and styles, and illuminated buttons make it like shooting fish in a barrel to observe them after dark. When pressed, doorbell buttons create an electrical bespeak that activates the doorbell chinkle, the component that generates the sound you hear. Basic chimes play a stock-still series of sounds, while more advanced devices let you choose one of many audio cues. Doorbells designed for multiple entries can play different sounds depending on which push button was pressed so you know which door to answer. Some chimes also light up to provide a visual betoken in improver to an sound tone.
The terminal component of a doorbell system is the transformer. It performs the essential function of converting 120-volt line ability to the depression-voltage current used past most doorbells.
Which Doorbell Pattern?
 There are several types of doorbells, and low-voltage systems are the most common. They utilise 12- to 16-volt ability and tin can be installed past DIY homeowners. Line-power doorbells employ 120-volt current and may need professional person installation. Wireless doorbell designs employ a radio signal to actuate the chime. They require no transformer and are either battery powered or have a standard Air-conditioning ability plug.
The Installation
Before you Outset
The steps outlined here describe how to install a doorbell arrangement with low-voltage power for a single door. While projects involving low-voltage circuits usually don't require a permit or electrical inspection, check local building codes earlier you begin. If you lot're replacing an existing doorbell, you may be able to use the existing 120-volt power source and transformer mount for your new installation. If there's no excursion present, have a licensed electrician install one, forth with a mountain for your new system's transformer. You'll also want to gather some tools before yous begin:
- Voltage tester
- Flashlight
- Phillips and apartment screwdrivers
- Wire cutters/strippers
- Wire nuts
- Ladder
- Drill and assorted bits
- Stud finder
- Fish tape and cord
- Hammer or staple gun and electrical staples
- Masking record and a pen
Depending on your habitation's age and structure, your doorbell's design and the location of your transformer and chime, yous may need additional woodworking tools to create a path for wiring.
Prophylactic First
As with whatsoever electrical projection, shut off the electricity before you showtime. At your home's main electrical box, locate the breaker that controls ability to the doorbell circuit and plough it OFF. Yous may also want to post a note and use tape to create a barrier, so no i turns the power dorsum on while you work. Apply a voltage tester at the junction box providing power to your new doorbell to ensure there's no current present.
Prep Your Work Expanse
Once the electricity is off, yous can remove any erstwhile doorbell components. If the existing wire is however adept, label all connections with your masking tape and pen. If you're replacing the wiring also, get out information technology in identify for at present, since you may be able to use existing wires to pull new connections through the wall.
Starting at the transformer, remove the wire nuts on the 120-volt connection, unscrew the low-voltage terminals and detach all wires. Unscrew the transformer from the base and remove information technology. Motion to the chime and disconnect the low-voltage wires, labeling them if needed. Remove the chime from its mounts. Finally, unscrew the doorbell and disconnect the wires there.
Lay Out the Wire
For this type of doorbell, you'll employ low-voltage wire, also known equally bell wire, to connect all three components. Because many kits come with 2-conductor wire, it's often easiest to pull a single pair of wires from the transformer to chime and so to the doorbell button, merely the all-time layout for your home will depend on the arrangement you cull. You'll need to make 3 separate connections:
- The transformer to the doorbell button
- The transformer to the chime
- The chime to the doorbell button
Programme a route for your wire that minimizes the cuts and holes you accept to make to simplify the process. If you're replacing an existing installation, exist certain you remove onetime fabric to avoid confusion when it's time to brand connections. You'll probably demand to lay wiring both vertically through the wall and horizontally in an attic or basement.
Run horizontal wire along the sides of ceiling or floor joists where possible, securing information technology every 4 feet using electrical staples and a hammer or staple gun. If you lot must cross joists, drill pocket-size holes at each crossing to avert running wire across the tops of boards where it may exist damaged.
Running wire up or downwards walls ordinarily requires drilling a hole through the wall's summit or sole plate and so using fish tape to pull the wire where information technology'southward needed. You lot may need to drill additional holes through studs or cut channels in your door'south framing to connect your unique doorbell push button.
A Pro Fishing Tip
The obvious way to pull wire is to insert your fish tape at the button or chime opening and use information technology to pull the wire to the connection, merely there'southward an alternative method that may be easier.
Start at the wire end and feed your fish record toward the component opening. Once information technology'southward there, tie a string to the terminate and pull it back. Tie the string and wire together and pull both through to the final location.
Making the Connections
Once all wiring is in place, it'south time to complete your doorbell design by connecting the components. Kickoff at the button and strip the ends of the ii wires with your wire strippers. Fasten i to each last on the back of the button and tighten the screws to create a tight connectedness. In this case, it doesn't affair which last you utilize for which wire. Constrict the remaining wire into the wall behind the button mountain and install it according to the manufacturer'south directions.
Once the push button is in identify, motion to the doorbell chime. Using the same procedure, make the 2 connections here. In this example, the order does matter. Connect the transformer wire to the terminal labeled "common" or "transformer" and the wire from the button to the terminal labeled "front" or "button". Consult your user's guide if the terminals take different labels. One time the connections are complete, mountain the chinkle in the location you've chosen co-ordinate to the manufacturer's directions.
 Make the last connections at the transformer. Earlier you brainstorm, you may want to double-check the breaker to ensure it's OFF. Identify the depression-voltage connectors; they should be screw terminals similar to those found on the other components. Connect the low-voltage wires from the chinkle and push to the transformer terminals. Just like the push, the guild doesn't matter here either.
Finally, connect the 120-volt side of the transformer. Both primary power and the transformer should have black and white wires. They may also have a green or bare basis wire. If your main ability looks unlike, stop and consult a professional electrician. You'll be connecting white to white, black to black and greenish/copper to dark-green/copper. Strip the ends of each wire, twist them together and secure them with wire nuts. If your doorbell transformer has a ground wire but there'due south no matching connexion on the main power side, look for a green spiral in the junction box and secure the ground wire there. Once you lot've finished the transformer connections, install it on its mount, tuck the wiring inside the junction box and shut the lid. It'due south time to test your new doorbell.
Cut Yourself Some Slack
When pulling low-voltage wire, it'south a good idea to leave a fiddling actress material to simplify connections. A loop of wire tucked into the wall behind the fixture also saves a lot of work if you have to replace a component at a later on date.
Finalizing Installation
Before you turn on the power, review all three components and make sure they're secure and continued correctly. Once you're satisfied, turn power ON at the billow and test the system past pressing the button. You may besides want to check to your user's guide to see if your chime offers any unique doorbell sounds and make any setting adjustments necessary.
Doorbells can add value to your home and inform you when guests arrive or the kids are home from school. Installing your own system is a fun project for any DIY enthusiast. Put your newfound knowledge of how to install a doorbell to good apply and greet visitors with a custom ringtone.
*Legal Notice: Destination Lighting content is for information only. It is strongly recommended that you lot consult a professional before attempting any lighting or wiring projects. The company is not liable for misuse of its content.

Source: https://www.destinationlighting.com/fliptheswitch/how-to-install-a-doorbell-button/
Posted by: platzlogy2000.blogspot.com
0 Response to "How To Install A New Doorbell Button"
Post a Comment